Showing posts with label dessert. Show all posts

Friday, 30 August 2013

Fudgy Milk Chocolate


Milk chocolate fudge is a quick and easy dessert recipe. You simply mix together and pour in a batter and let cool. This treat need not be baked. You just have to slice them into squares and serve them or give them away during potluck, birthdays or special occasions. To serve with coffee or tea to guests this delicious treat is perfect. You need white chocolate chips, butter, walnuts, vanilla extract, and sweetened condensed milk to make a simple milk chocolate fudge.

When melting the chocolate in the saucepan you have to be careful as it may turn grainy or burn. Melt the chocolate in a double boiler or bain-marie to be sure. You can improvise if you don’t have these kitchen gadgets. Melt the chocolate in a saucepan over another saucepan of simmering water, but make sure that the bottom of the saucepan where the chocolate is does not touch the simmering water. Otherwise, you can safely melt the chocolate over very low heat using a heavy bottomed saucepan as long as you watch over it and constantly stir it gently to avoid clumping. But too much stirring will also cause your simple dessert recipe texture to become uneven so do so gently.

A good fudge is smooth and silky. It should not be grainy or crystallized. Since white chocolate chips are typically already sweetened this recipe does not use sugar. Once all the chocolate has melted, it should be a smooth and thick chocolate liquid and should have no visible crystals.

When making milk chocolate fudge timing is crucial. Be sure to measure out all the ingredients before starting the mixture so that you can work in a constant pace. Chop the nuts and grease the pan with butter. The nuts should be added last and gently fold it in the mixture until it is evenly distributed throughout.


Ingredients
200gms white chocolate chips
½ cup butter
3/4 cup chopped walnuts
2 teaspoons vanilla extract
150ml sweetened condensed milk,

1. In a saucepan melt the chocolate over medium low heat. Keep stirring often.

2. Turn off the heat once the chocolate is melted. Keep aside.

3. Add condensed milk, butter and vanilla to the melted chocolate. Stir well.

4. Blend until butter is mixed with the chocolate. Then fold in the chopped nuts.

5. In a greased pan pour this mixture and allow it to cool. Cut into equal shapes. Serve.

Sunday, 25 August 2013

Chocolaty Drop Cookies


Chocolate comes from a fruit called a pod that grows on the cacao tree. A seedling tree generally must mature for five years before it produces pods, with peak pod production happening at 10 years. A cocoa tree that makes up your favorite gourmet desserts can bear fruit and produce pods for 30 to 40 years. Each pod is similar in size to a football, and contains up to 50 cocoa beans. To make one ounce of milk chocolate, it takes 4 cocoa beans, and one ounce of dark chocolate requires 12 beans. An average American or Canadian will consume about 12 pounds of chocolate per year. However, the Swiss are the world’s largest consumers of chocolate, eating about 22 pounds of chocolate per person per year!

Chocolate can be bittersweet, and we don’t mean literally. Although chocolate has many benefits to your health, some facts about how chocolate is made may make you want to munch on a different snack, or at least lower your chocolate intake. These cookies are usually served hot with a chocolate sauce or vanilla ice cream - or both. If there are leftovers, refrigerate them and eat them cold. For best results, use a quality dark chocolate favorite gourmet recipes.


Ingredients
2 square chocolate
100gms cup butter (melted)
1 cup brown sugar
½ teaspoon soda
1 egg
2 cups all purpose flour
¾ cup sweet milk

1. In a pan, melt the chocolate. Add melted butter to this. Add the sugar, egg, milk, baking soda and flour, mixing until smooth. Batter should be stiff enough to drop from the spoon.

2. Drop by spoonfuls on greased pans. Bake in a 350 degree F. preheated oven for about 30 to 35. Frost, if desired.

Sunday, 18 August 2013

Healthy Raw Honey


For hundreds of years, raw honey has been widely used for treating a number of health conditions. It's often used to treat rashes and wounds topically. It also can be consumed to cure infections and to treat many other health conditions. A spoonful of honey a day - just might keep the doctor away! It’s also used to make healthy recipes for you to enjoy.

What Is Raw Honey?
Raw honey is simply honey that hasn't been heated, processed or pasteurized at all. The real differences between pasteurized honey and raw honey are very important. Raw honey is a nutritious food that has many natural vitamins, minerals, antioxidants and other essential natural nutrients. These healthy nutrients are destroyed when honey is heated during the pasteurization process. Actually, pasteurized honey is just about the same as unhealthy refined sugar. Even your favorite gourmet recipes are using raw honey as one of their ingredients.

Unfortunately, most people like to buy crystal clear, clean looking honey because they do not know about the benefits of raw honey. Most of the time, raw honey is not readily available on most supermarket shelves. Raw, unfiltered honey normally crystallizes to a very thick consistency just after a couple of months. Don't worry about it if it does, because the honey is still good to eat and still very delicious. It's great to use as a spread for muffins, breads and pancakes. This type of honey can also be mixed in hot tea or coffee.

Benefits of Raw Honey
Many times, raw honey that is unfiltered can only be bought right from a bee farm. This type of honey appears cloudier and has very fine textured crystals. It contains small flecks and particles of bee pollen, propolis (resinous mixture), honeycomb bits, and sometimes bee wing pieces. It's important to note that propolis has more than one hundred and eighty compounds in it, which includes caffeic acid phenethyl ester, and this compound has shown that it can inhibit the growth of cancer. 

This kind of honey contains high levels of antioxidants. Antioxidants are compounds that can stop oxidation and neutralize the effects of free radicals that can cause problems for the body. Boosting the body's antioxidant levels often helps to protect against cellular damage and also to stop the progression of many chronic diseases.

Honey that hasn't been processed has several anti-bacterial, anti-viral, and anti-fungal properties. It is an anti-inflammatory and expectorant, which means it works very well for treating respiratory ailments such as asthma and bronchitis. The benefits of raw honey do not end there. It can also stabilize blood pressure levels, relieve pain, balance sugar levels, soothe nerves, and it's very effective for treating ulcers.

Additionally, it promotes digestive health, has bacterial fighting qualities, improves the immune system, reduces allergy symptoms, is a very good treatment for skin wounds, as well as other kinds of infections. Local unprocessed honey is recommended for the treatment of seasonal allergies because the chances are high that the honey will have small quantities of the specific pollens that the person is allergic to.

Unfiltered honey can actually pre-digest starches when it is put on bread for about fifteen minutes. The amylase enzyme starts to breakdown the complex starches/sugars in the bread and this makes it easier for the body to digest. This is quite beneficial for people who have digestive problems.

Saturday, 20 July 2013

Goat Cheese Pie


Pies are usually made from nuts, custards, and even ice cream. In this recipe, the main ingredient is the fresh and tangy goat cheese. It is made into a tart with pine nuts for texture and a sauce of limoncello and lemon liqueur to bring out the natural bright flavors of the creamy goat cheese. It’s a beautiful contrast of delicate softness and acidic sharpness to end the meal with.

Making the goat cheese pie entails three procedures that must be made chronologically to ensure the success of the one of the best Gourmandia recipe. First is the making of the pastry, then cheese-based filling, and finally the lemon sauce. Unlike the usual pate brisee, the special pastry kind of pastry used for the goat cheese tart is called “fleur pastry.” It’s a pastry typically used to make sweet flans such as apricot and peach. It also serves as a base for quiche or as a short-crust pastry.

Source your goat cheese from the farmer’s market, specialty cheese shops and bigger supermarkets with a well stocked cheese counter. While it is ideal to use all goat cheese for the filling, you can also experiment creativity by using half goat cheese and another kind of cheese. For sharper flavors, add cheddar or bleu cheese to the goat cheese mixture. On the other hand, if you prefer a milder flavor, you can use a mild cheese like Emmental.

Make the lemon sauce out of the limoncello last. The latter is a special type of lemon liqueur produced in Southern Italy. Limoncello is made from the zest of Sorrento lemons or Femminello St. Teresa lemons, giving them that very distinct flavor. Lemon liqueur is typically made with sugar, water, lemon juice, lemon zest, and 5% vodka. It has a bright lemon yellow color and tastes both sweet and sour. When these two are combined, imagine the potent but pleasing contrast to the rest of the goat cheese pie.

Ingredients
Fresh mint
For the sugared dough:
1/2 lb. butter
1 oz. honey
2 1/2 oz. sugar
0.88 lbs. flour
1 oz. egg yolk
a pinch of vanillin
a pinch of salt
1 lemon pulp

For the base:
1/2 lb. cheese (50% goat cheese)
3 1/2 oz. eggs
1 vanilla pod
1.8 oz. sugar
1 lemon pulp
For the sauce:
0.44 lbs. wild strawberries
1 1/2 oz. sugar
glass of water
For the garnish:
1 1/2 oz. pine nuts
currants

1. To make the pastry, first, mix the icing sugar, pre-softened butter, some lemon zest, and the egg yolks. After all the ingredients have melded well together, add the flour and some pinch of salt. You should end up with pastry dough with nice and even consistency. Leave in the refrigerator for half an hour before you use it.

2. Make the cheese-based filling. You can use all goat cheese or you can replace the other half with another cheese. Add the egg as required by the recipe and then the caster sugar, the lemon zest and some vanilla seeds. Mix all together. This mixture is used to fill the tarts.

3. Use a rolling pin to flatten the pastry very thinly to about half a centimeter in thickness. Place it in a baking dish or a round mold for making the pie or tart. Put it in the oven at 180 degrees for ten minutes. Let it cool for a few minutes after baking.

4. Fill the bottom of the tart with the cheese based filling. Cover the top with pine nuts. Dust it with icing sugar. Place in the oven for 15 minutes at 180 degrees.

5. Pour the limoncello sauce on a clean plate and place the tart on the side. Decorate with red currants. Sprinkle on a little icing sugar.

Wednesday, 17 July 2013

Delicious Avocado Dessert

This gourmet recipe for avocado sherbet is spiced with some Tabasco sauce for a surprising and pleasant kick. The special sherbet is garnished with melon balls tossed in vinaigrette dressing made with old wine vinegar and honey. Not only is the taste unforgettable and refreshing, it also looks elegant and makes a divine dessert for special occasions. Serve this with some champagne for a memorable dinner or party. 

In addition to the Tabasco sauce, the avocado sorbet is also flavored with wine and lemon juice for a tangy and intense flavor. The melon balls covered in honey make a delightful and bright contrast to the creamy avocado. This is quite a healthy recipe and does not require any heavy cream or other fattening ingredients to make it luscious and creamy since avocado is already naturally silky and creamy. Use perfectly ripe avocados for making this dessert recipe. 

For superior results, use an ice cream maker for churning the sorbet. This will give you a thick creamy sherbet with professional results. You can still make sherbet without an ice cream maker, however. A regular kitchen blender helps smoothen out the ingredients for making a delicious and impressive sherbet. After all the ingredients for the avocado sherbet are well blended and mixed together, place the mixture in the freezer for a few hours or until the whole is completely frozen. A method for making a smooth and creamy sherbet is to mix the sherbet using a blender after it has frozen. Take the sherbet out of the freezer and blend it for about thirty seconds and then place it back in the freezer again to harden completely. You can do this process two or three times for a nice, smooth and creamy texture similar to what you would obtain with an ice cream maker. 


Ingredients 
Sherbet: 
2 large avocados 
1 cup dry wine 
1vcup water 
0.44 lbs. sugar 
Tabasco, salt 
pepper 
2 green lemons 

Melon balls: 
1 large melon 
1 tablespoon old wine vinegar 
3 tablespoons honey 

1. Peel the avocados, slice into halves and take out the seed or the core. Place in a mixing bowl and pour lemon juice. 

2. In a saucepan, add water and sugar and simmer to make syrup. Add the avocados to the syrup. Add wine, drops of Tabasco, and a dash of salt. 

3. Sieve the mixture for a purely liquid texture. Place the mixture in an ice-cream machine to make a sherbet, following package instructions. 

4. Bring the vinegar to boil. Add honey and allow it to boil again. Set aside. Prepare the melon balls and cover them with the vinaigrette. 

5. Arrange three scoops of sherbet on a serving dish. Place the melon balls around. Sprinkle with drops of vinaigrette.

Sunday, 14 July 2013

Creamy Chocolate Pudding

Chocolate rice pudding is a satisfying comfort food that can be enjoyed for breakfast, snack or dessert, made from simple ingredients that are readily available in most pantries. All you need is white rice, milk, sugar, vanilla extract, butter, cocoa, and egg to make this recipe. To make a delicious chocolate rice pudding you can also use left over rice and is a great way to use up extra rice left from a meal. Use high quality rice if you want something more luxurious like basmati, which makes a fragrant dessert, or Arborio, which is often used to make risotto and makes a creamy pudding. For a sumptuous yet inexpensive dessert, however, any short-grain rice will do. For the winter or during cold and chilly weather this is also the perfect comfort food. 

Usually chocolate pudding often starts with custard flavored with chocolate and thickened with a cornstarch or any other thickening agent. In this recipe, is used to thicken the pudding. Rice makes the perfect base for a thick and creamy pudding since rice is naturally glutinous. The vanilla and chocolate give it a depth of flavor and the eggs help make the pudding light and fluffy. Milk breaks down the rice and makes it creamy while the butter also adds silkiness to the pudding, as well as sumptuous flavor. 

In this recipe the rice is cooked separately and then mixed with the other ingredients and cooked further. In a separate saucepan the milk, sugar, vanilla, butter, cocoa and egg are mixed together before it is added to the cooked rice. To prevent the milk from scorching use a heavy bottomed saucepan when mixing the ingredients. They should be heated on very low heat for these are very delicate ingredients or they will burn or form clumps. Be careful not to scramble the eggs. Mix them only enough until they are all blended together. 

Ingredients 
3/4 cup white rice 
1 1/4 cups water 
1 1/2 cups milk 
1/3 cup white sugar 
1 teaspoon vanilla extract 
1 tablespoon butter 
2 tablespoons unsweetened cocoa 
1 egg 

1. In a pan wash the rice and set aside for 5 minutes. 

2. In a saucepan bring water to a boil and stir in the washed rice. Simmer for about 20 minutes and cover it. 

3. Mix in a separate saucepan, the milk, sugar, vanilla, butter, cocoa, and beaten egg. 

4. Pour this chocolate mixture in it once rice is cooked. Let simmer for about 20 minutes. Stir often. 

5. When the desired consistency is reached rice pudding is finished. Then allow it to cool. Serve in a pudding tray. 

Friday, 12 July 2013

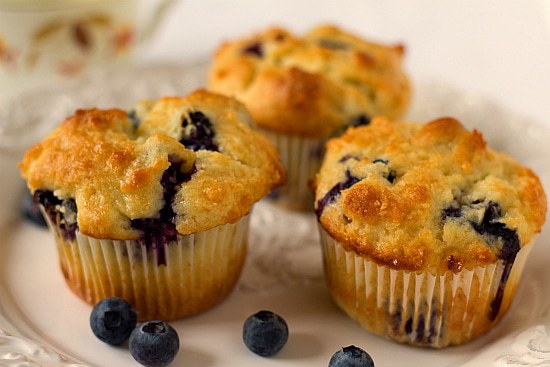
Berry Muffins

Fresh blueberries and luscious applesauce combine to create moist and tender muffins for a perfect way to start the day. Bursting with wonderful color and irresistible aroma, these delicious muffins, adapted from The Country Art of Blueberry Cookery by Mrs. Clifford Davis Morrison, also make excellent snack or dessert with a cup of tea or coffee. The applesauce adds moisture to the muffins and its sweet and tangy flavor makes a fine contrast to the blueberries. The applesauce should be prepared ahead of time, or it can be bought in the grocery store packaged in a jar. 

You need only a few handful of ingredients to make scrumptious muffins including flour, sugar, baking powder, salt, baking soda, mace, eggs, applesauce, shortening, and fresh blueberries. Mace is the outer layer that covers the nutmeg spice and is sold either ground or in blades. It has a milder flavor than nutmeg and typically added to sauces, soups, sausages, fish dishes, and pates. Nutmeg and mace have similar aroma and flavor, with nutmeg being slightly sweeter and mace being more delicate. Mace imparts a bright orange tinge or hue that is like saffron to dishes it is added to. If you can’t find mace, you can also use nutmeg to flavor the muffins although in lesser quantity. For guidance check out some recipe videos online. 

For best results, all the ingredients should be at room temperature before making the batter, including the milk, eggs and applesauce. The dry ingredients should first be combined together and blended and the wet ingredients are combined separately. When mixing the dry and wet ingredients, do not over mix until smooth. The batter should be a bit lumpy to incorporate air into the muffins as they are baking and produce a light and airy result as opposed to dense and heavy. The dry and wet ingredients are mixed together just until the dry is completely moistened. The blueberries are folded in last to prevent them from disintegrating. 

Ingredients 

3 cups all-purpose flour 
1 cup granulated sugar 
1 tablespoons baking powder 
1 teaspoon salt 
1/2 teaspoon baking soda 
½ teaspoon mace 
2 eggs 
1 cup applesauce 
¼ cup melted shortening 
2 cups fresh blueberries 

1. Preheat the oven to 350 degrees F. Grease a muffin tin or line the cups with paper and set aside. 

2. In a large bowl, blend together the flour, sugar, baking powder, salt, baking soda, and mace. 

3. In a separate bowl, beat the eggs. Add the applesauce and shortening and blend well. Add this applesauce mixture to the flour mixture, blending well. Fold in the blueberries. 

4. Pour the batter into the muffin tin, filling each cup ¾ full. Bake for 20 minutes, or until a toothpick inserted in the center comes clean. 

5. Remove from the oven and allow to cool in the tin for 5 minute. Remove muffins from the tin and let cool completely on a wire rack.

Steaming Your Corn Pudding

Raisin and corn together creates a delectable pudding. The raisin enhances the natural sweetness of corn. In this recipe, corn and raisin are combined with milk, breadcrumbs, eggs, sugar and flour to make pudding. The mixture is steamed bound in cheesecloth instead of baking or frying,. The result is a firm and nutritious dish that makes a yummy dessert, snack or side dish to meats or fish for lunch or dinner. Seasoned with some maple syrup corn and raisin pudding also makes a delightful breakfast and enjoyed like pancakes with some bacon and eggs. 

The fresh corn needs to be shucked and scraped off the cob before making the recipe. To make this recipe you need at least three cups of corn kernels. The milk should also be heated and scalded and the eggs beaten. Clean the raisins then soak them for a few minutes in warm water to reconstitute them. 

Purchase corn on the cob and cook them on the day you bought them, ideally on the day they are picked. Once harvested, corn starts to diminish in sweetness and turn starchy and mealy. Shuck the corn, removing the husk and remove the silky hairs covering the cob. To help remove sticky and stubborn silky hairs use a dry towel. To scald milk is to heat it just to the point of boiling. Scalding milk is crucial for a better pudding texture that is similar to custard in softness. To scald the milk use a double boiler or a saucepan. Preferably, use whole milk for scalding. Use a candy or fry thermometer to determine the temperature of the heated milk. The milk should be heated to 180 degrees. At this temperature the milk should come to a light froth. When you see tiny bubbles forming around the edges of the pan, you know that the milk is ready and scalded. 

Ingredients 

3 cups corn, off the cob 
1 1/4 cup raisins, cleaned 
1 1/4 cup bread crumbs 
1/2 cup milk, scalded 
3 medium eggs, well beaten 
4 tablespoon white sugar 
4 tablespoon flour 

1. Boil the corn with water in a pot, for 5-10 minutes. Cool and scrape off the kernels from the cob 

2. Beat together the eggs, breadcrumbs, flour, sugar, milk and raisins in a bowl. Mix well. Add the corn and mix well. 

3. Place mixture in a cheesecloth and tie with a string. Then place in a double boiler and steam for about 50 minutes. 

4. Remove the pudding from the cheesecloth. Serve warm. 

Thursday, 11 July 2013

Almond Joy Cake

From box cake mix jazz up a chocolate cake and you will have an extraordinary and impressive dessert. In this recipe, box chocolate cake mix is baked according to the package directions. It is then frosted with a luscious almond-icing glaze that will make the cake simply spectacular and suitable even for the most special occasions and to help you out here are some best cooking videos  Make this recipe for almond joy cake if you don’t have time to bake a cake from scratch but want an elegant and beautiful presentation. You need evaporated milk, granulated sugar, marshmallows, coconut, margarine, chocolate chips and silvered almonds to make the double glaze.

You can make the preparations for the almond icing while the cake is baking. The margarine and the chocolate chips need to be melted separately. For a richer and more luxurious taste you can also use butter. Over very low heat you can melt the chocolate chips or better yet, use a double boiler, bain-marie or water bath to avoid the chocolate from scorching or burning. When melting the chocolate avoid any contact with water. The saucepan and spatula or ladle you are using to melt the chocolate must be dry. Since the chocolate will easily become grainy or lumpy if overheated be attentive when melting the chocolate over very low fire. Use a rubber spatula to stir the chocolate when the chocolate starts to melt. You can also melt the chocolate in a microwave. Melting the chocolate in the microwave if done right is a lot quicker and requires less effort then melting it in the stove. Done wrong, however, you can ruin a good chocolate. You also make a mess in the microwave.

When melting chocolate the important thing to consider is choosing the right kind of container. Use a microwave-safe bowl that will remain cool or slightly warm after microwaving. To avoid burning or scorching heat the chocolate on a low power setting.


Ingredients

1 box chocolate cake mix
1 1/4 cup evaporated milk
3/4 cup granulated sugar
1 bag (8 oz.) large marshmallows
1 bag (8 oz.) coconut
3 tablespoon margarine, melted
1 bag (12 oz.) chocolate chips, melted
1/2 cup slivered almonds

1. As directed on the package bake the cake mix.

2. Mix evaporated milk, sugar, marshmallows and coconut in a saucepan. Stir well. Then heat over a medium burner until the marshmallows melt. Remove from heat. Then pour over the baked cake.

3. Add margarine, sugar and evaporated milk in a separate saucepan. Bring to a boil over medium-high heat. Then add almonds. Remove from heat and pour over the baked cake.

Wednesday, 10 July 2013

Your Angel Food Cake

Because of the ethereal lightness, angel food cake which is a type of sponge cake is often called as the “food of the angels.” In this recipe, for a luscious flavor, vibrant color and scrumptious texture, angel food cake is decorated with fresh raspberries. The whipping of the egg whites until they are stiff is one of the most important steps in making a successful angel food cake. This is a crucial step for ensuring a light and fluffy texture similar to making soufflé. 

You need sugar, flour, cream of tartar, salt, wheat flour, and vanilla extract to make an angel food cake. The dry ingredients are first mixed together and the beaten egg whites and vanilla extracts are incorporated or folded in the dry ingredients. The cream of tartar stabilizes the egg whites and to create a light and airy cake it works as a leavening agent. Flour made of softer wheat is ideal for making angel food cake. In this case cake flour is the best type of flour to use since it has a very light texture and contains no fat that creates a light taste and weight. 

Angel food cake is typically baked in a special pan made especially for making this kind of cake. However, a tube pan also works for making angel food cake. This type of pan is tall and has a round shape with a hole in the middle. A bundt pan can also be used to make angel food cake, but releasing the cake from the fluted sides of bundt pan be challenging. The center tube or hole allows the cake to rise better and higher, clinging to all the sides of the pan as it bakes. So that it can crawl up to the surface and rise it is important not to grease the pan when making angel food cake. The pan is inverted while it is being cooled after the cake is baked, to avoid the tendency of the cake to fall on itself and collapse. 


Ingredients 

2 egg, separate egg whites 
100gms white sugar 
100gms wheat flour 
1 teaspoon cream of tartar 
Pinch of salt 
1 teaspoon vanilla extract 
2 cups raspberries - fresh or frozen (thawed) 

1. Mix the raspberries and 2 tablespoon sugar in a bowl. Set aside. Allow to marinate for couple of hours. 

2. Mix all the dry ingredients in a separate bowl. Add the beaten eggs, vanilla extract, and other ingredients to this. Mix well. 

3. Bake in an ungreased angel food pan in a preheated oven for 20-35 minutes at 185 degree F. 

4. Once done, allow it to cool. Decorate with freshly chopped raspberries. Serve at room temperature. 

Tuesday, 9 July 2013

Apricot Apple and Banana Pudding

On its own, milk pudding can be boring or can be easily tiresome. Adding a mixture of fruits is one way to give it more life, flavor and vibrant color. In this recipe, sliced bananas, apricots and apples are made up as base of this delicious pudding recipe. This makes a luxurious breakfast. It is also an elegant dessert that you won’t get bored of soon. These three fruits combine well together to give full texture, color, and flavor and to create harmony in the palate and invigorate the senses.

You need scalded milk, sugar, flour, eggs, and vanilla extract to make the pudding. When making this recipe use fresh fruits. This is a great dish to make when apricots are in season. Bananas and apples are typically available all year round. Make sure that just before making the pudding is the time you peel and slice the fruits since they oxidize and change color once exposed to air.

Before adding it to the other ingredients you also need to scald the milk so timing is crucial when making this recipe. Scalded milk, technically, is milk that has been heated to 180 degrees F, a temperature that destroys the enzyme in the milk and kills any present bacteria. In scalded milk many of the proteins are also denatured. The milk is heated just to the edge of boiling. In the process of scalding the milk it is important to keep a watchful eye on it to prevent it from boiling over, scorching or burning. A kitchen thermometer should be used ideally to monitor the temperature of the milk.

The scalded milk makes a difference in the texture of the pudding. Use a heavy bottomed saucepan or double boiler to scald the milk. Use whole milk and a candy or fry thermometer, which can be clipped onto the saucepan. At 180 degrees over low heat, the milk will lightly froth. You will see tiny bubbles forming around the edges of the pan.


Ingredients

6 3/4 oz. (5/6 cup) milk, scalded
6 tablespoons sugar
½ cup flour
2 well beaten eggs
4 apricots cut into halves
2 bananas, sliced
2 medium apples, peeled, cored, sliced
1 teaspoon rice vanilla extract

1. Mix the sugar, flour, eggs and vanilla extract in a large bowl. Then slowly add the milk and mix well.

2. Into a pudding tray pour all the chopped fruits. Pour the milk mixture over this.

3. In a pan of water place the pudding dish. Bake in a 180 degree F. preheated oven for 30-35 minutes.

Friday, 5 July 2013

Dessert Trifecta

Desserts can be viewed from a broader perspective to include all foods that are naturally sweet. Rather than offering candy, cookies and packaged cakes that are rich in carbohydrates and calories but provide little nutrition, choose high quality sweets. High quality sweets will contain small amounts of naturally occurring sugars, along with other beneficial nutrients. Naturally sweet foods will satisfy your children's naturally sweet tooth. And, it is an alternative that you, as a parent, can feel good about.


1. DARK CHOCOLATE - Perfect for chocolate lovers like myself, dark chocolate is loaded with natural antioxidants and minerals. This is because chocolate comes from cacao beans, grown on the cacao tree, and full of natural plant nutrients. Choose 2-3 squares (not the whole bar) of 85% - 99% cacao. The higher the percentage of cacao, the more bitter the chocolate will taste.

2. BERRIES SORBET - Blend 1 cup strawberries, 1 cup frozen pineapple, 6 ounces of coconut milk and 1 very ripe banana using a blender. Children love that this is pink! I love the many health benefits to berries. One cup of strawberries contains a whole day's requirement of vitamin C, plus other vitamins, minerals, and fiber. Serve in a small bowl.

3. ALMOND "MILK"SHAKE - Combine 1 overflowing cup of raw almonds with 16 oz water, 2 tsp vanilla, 2 tbsp unsweetened, shredded coconut, 6 dates, 1 tbsp of chia seeds, and ice to taste. Blend all ingredients in a high speed blender until smooth. The chia seeds create a milky, "milk" shake consistency.

Tuesday, 2 July 2013

Pie from the Pines

Custard pies are a simple affair of milk, eggs and sugar in a pie crust. But chef Stephane Raimbault of the L'Oasis restaurant changes all that by infusing the custard with essence of orange tree flowers and incorporating a topping of caramelized pine nuts. These ingredients transform the simple pie to the sensational gourmet pie that is worth trying. At the heart of the custard pie is an infusion of milk with the orange tree flowers. These flowers are traditional ingredients in Moroccan, Mediterranean and Middle Eastern cuisines, particularly in cakes and scones. The essence is simply in the form of orange flower water, which is bottled after it undergoes a steam distillation process.

While you may not easily imagine milk and orange in the same mixture, the chef balances out these two ingredients. The addition of the orange blossoms lends a strong floral and citrus taste and fragrance to the pie. As if you’re an in apothecary kitchen, make the orange blossom essence yourself. The decoction is made by mashing the petals and boiling it together with the milk and the vanilla bean pods. Acquire the orange tree blossoms from organic specialty stores, an orange grove that does not use pesticides in its plants, or your own garden. Rinse the flowers in cold water to get rid of any dirt. Lay the flowers on a paper towel to dry. Remove and discard any rotten leaf or blossom from this batch. Use a mortar and pestle to crush the petals and make a thick paste. Strain it using a fine strainer or cheesecloth after making the decoction. But you can also use a cheesecloth or tea bag to wrap the petal paste and simply remove afterwards. Make your own pie crust or purchase a ready-made pie crust from the store. Make sure it is frozen so it holds shape. Take it out of the freezer or chiller only when you are ready to bake the pie.

Ingredients

½ cup milk
1 vanilla pod
¼ cup sugar
2 egg yolks
1/2 lbs. cream
orange tree flower
piecrust
pine nuts

1. Crush the orange tree flower in a mortar and pestle. Prepare the decoction by boiling together milk, vanilla, and the crushed orange tree flower. Allow to infuse for a couple of hours. Strain in a fine sieve or using a cheesecloth.

2. Prepare the custard. In a bowl, mix sugar and egg yolks until smooth and pale. Add cream and whisk. Gently combine this mixture with the infused milk. Set aside.

3. Make the caramelized topping. In a pan over low heat, melt some sugar until it becomes syrup. Add the pine nuts and caramelize. Let cool. Crush this mixture and set aside.

4. Take out the pie crust and layer it in an 8-inch tart mold.

5. Fill the tart with the orange tree flower custard. Bake for 45 minutes in a 200 degrees F oven. Remove from oven and sprinkle with caramelized pine nuts and powdered sugar. Serve warm.

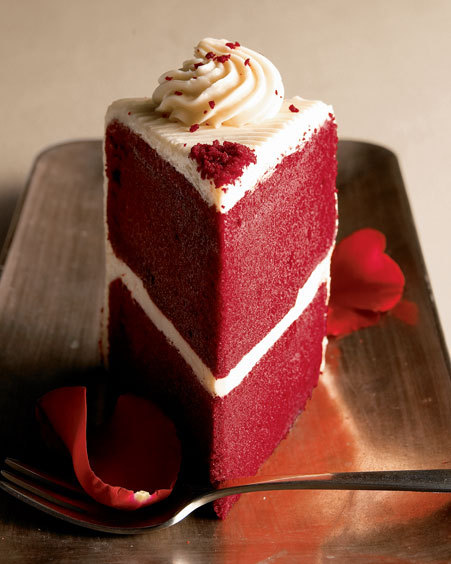
Blazing Velvet Cake


Have you been looking for a red velvet cake recipe? If you are someone who prefers to make a red velvet cake recipe from scratch rather than buy it in a box at the store or try to modify a box of cake with red food coloring, you are going to enjoy this recipe! In order to complete this red velvet cake recipe you will need the items and ingredients listed below:

3 round cake pans
Vegetable oil or other non-stick coating for the pans
2 cups all-purpose flour
1 ½ cup sugar
1 teaspoon baking soda
1 teaspoon salt
1 teaspoon cocoa powder
1 cup buttermilk
2 eggs
1 egg white (for added moisture)
2 tablespoons red food coloring
1 teaspoon white distilled vinegar
1 teaspoon vanilla extract

Divide the cake batter so that each of the three cake pans has an equal amount of batter. Place the cake filled pans in the oven for about 30 minutes. You may need to adjust this depending on your oven. When you can put a toothpick in the center of the cake and pull it out clean, your cakes are done. Remove them from the oven and allow them to cool. Once they are cool, you can trim off any parts that will make the cakes unbalanced when stacked.

Gather the ingredients for your red velvet can recipe and allow the oven to preheat to 350 degrees. Sift the flour into a bowl. Add the other dry ingredients to this bowl and combine them. In a separate bowl, combine the wet ingredients. Using a mixer, slowly add the wet ingredients to the dry ones. Mix the ingredients until the batter is nice and smooth.

Using oil, butter, or some other type of non-stick material, coat the cake pans. If you prefer, you can line them with wax paper instead or sprinkle confectioner's sugar on the bottom of the pan. This is completely up to you. There is now worry about the sugar being seen because it will be covered with frosting.

No red velvet cake recipe would be complete without the cream cheese frosting. You will need the ingredients list below:

1 lb. cream cheese
4 cups confectioner's sugar
1 cup softened unsalted butter
1 teaspoon vanilla extract

Combine all the ingredients, sifting in the sugar. If you wish for a firmer frosting, make it as soon as the batter is done and put it in the refrigerator while the cakes bake. To frost the cake, coat the bottom layer with frosting on the top of the cake only. Place the second cake on top of the bottom one and repeat the process once the cake is firmly attached with the frosting. Repeat the process with the third layer of cake. This time, you will not only frost the top of the cake, but the sides as well. You can now decorate the cake as you please. It is common for people to decorate this particular cake with chopped walnuts, but it will not take away from the red velvet cake recipe if you choose to use something else.

Saturday, 29 June 2013

Healthy Chocolate Torte

Chocolate comes from a fruit called a pod that grows on the cacao tree. A seedling tree generally must mature for five years before it produces pods, with peak pod production happening at 10 years. A cocoa tree can bear fruit and produce pods for 30 to 40 years. Each pod is similar in size to a football, and contains up to 50 cocoa beans. To make one ounce of milk chocolate, it takes 4 cocoa beans, and one ounce of dark chocolate requires 12 beans. An average American or Canadian will consume about 12 pounds of chocolate per year. However, the Swiss are the world’s largest consumers of chocolate, eating about 22 pounds of chocolate per person per year!

Chocolate can be bittersweet, and we don’t mean literally. Although chocolate has many benefits to your health, some facts about how chocolate is made may make you want to munch on a different snack, or at least lower your chocolate intake.

What a chocolaty torte, an unforgettable treat for the chocolate lovers. Being flourless it’s a gluten-free torte, hence, very suitable to those who are allergic to gluten containing foods. Dive into the indulging chocolate torte and eat’em up all at once. Not too sweet and not too creamy, so having it every other weekend won’t be a bad idea even if you are diet conscious.

Ingredients

3 oz. unsweetened chocolate
7 ½ oz. (1 ½ cups) unblanched almonds
5 eggs, separated
2 egg yolks
¾ cup granulated sugar
Salt

For the Buttercream Frosting:
3 oz. sweet butter
½ teaspoon pure vanilla extract
½ cup granulated sugar
2 eggs
3 oz. unsweetened chocolate

1. Preheat the oven to 300 degrees F. Grease a 9 x 3-inch baking dish.

2. Chop the chocolate roughly. In a food processor, pulse together chocolate and almonds till powdered. Separately, beat 7 egg yolks and sugar with electric beater till yolks are lemon-colored but not thick. Mix with chocolate mixture. Now, in another bowl, beat 5 egg whites and salt till mixed well. Mix well together egg whites and chocolate mixture.

3. Dollop the batter into baking dish and bake for 65 minutes. Let the cake cool for 15 minutes. Remove the cake from baking dish and freeze for almost 1 hour.

4. In the same time,to make buttercream, beat butter and vanilla with an electric beater. Add cream and sugar and beat for 4 minutes. Add 1 egg and beat on high for 2 minutes and then add another one for same time. Melt the chocolate, stirring, in a double broiler on medium flame. Blend butter mixture and chocolate. Refrigerate till firm.

5. Remove cake from freezer and cut in two layers horizontally. Beat butter cream till smooth. Place cut side up on the platter. Spread 1/3 of cream on top of first cake layer. Put second layer on top. Place the remaining cream on the top and sides of the cake.

Friday, 28 June 2013

Pie Imprisoned by Cream

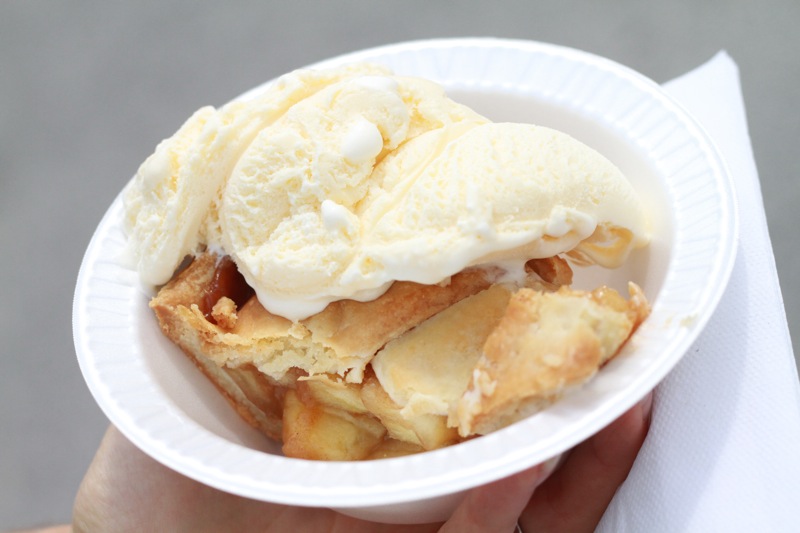
A French type of apple pie, Tarte Bagnarde is a special gourmet recipe conceived by Chef Roland Pierroz, head chef at the famous Hotel Rosalp. Named after the French term “Bagnarde,” which translates to imprisonment or a person convicted of a crime, this kind of apple tart is topped with a generous amount of whipped cream, covering the apples completely and hence “imprisoning” the apples. Following a few techniques shared by Chef Pierroz, tarte bagnarde can be made at your own home. According to chef Pierros, many people visit the hotel restaurant just to order the Bagnarde pie. Serve Bagnarde apple pie with a big scoop of vanilla ice cream or gruyere cream.

Choose firm, crisp and slightly tart apples for making a delicious pie. The tartness of the apples is perfectly complemented by the sugar, spices, and glazing. The apples should not turn into a watery mush when baking and should hold their shape well even after long hours of cooking over high heat. The best kinds of apples will turn tender and melt in the mouth with a hint of crunch. Some of the best kinds of apples for making apple pie include Cortland, Braeburn, Golden Delicious, Granny Smith, Fuji, Rome Beauty, Northern Spy, Jonagold, Pippin, Winesap, Gravenstein, York Imperial, Gala, and Orin.

The puff pastry should already be made beforehand. You can buy premade puff pastry in the grocery or bakeshop or make your own at home using favorite recipe. This French apple pie is decorated with almonds to give it crunch and flavor. The Gruyere cheese contrast finely with the sweet and tart apples and spices, and complement the flaky golden brown and buttery pastry. Served with vanilla ice cream, this gourmet dessert is dangerously delicious. Make this for a special someone on a special occasion.

Ingredients
1/2 lb. puff pastry with butter
1 oz. almond powder
2 apples
2/3 cup cream
3 ½ tablespoons sugar
¼ tablespoon cinnamon powder
powdered sugar

1. Peel the apples, quarter, remove the core, and then slice thinly.

2. On a round pastry, place a circular mold at the middle then spread the almonds around evenly. Remove the mold and arrange the apples around the circle of almonds, arranging it into a swirl. Bake the pie in a preheated 450 degrees F oven.

3. Mix some cream, sugar, and cinnamon then reduce in low heat. When the pie is about two-thirds cooked (about 10 minutes), add the reduced mixture then put it back in the oven till cooked (which will take about another 10 minutes).

4. Finish it off with multiple glazing. Start the first glazing by putting icing sugar around the edges. Put it on a salamander oven. Add ungrounded almonds around the edges then add another coating of icing sugar. Put it back in the salamander oven until caramelized and crunchy.

5. Serve it with a double gruyere cream, to add the smoothness as well as vanilla ice cream. Bon appétit!

Wednesday, 26 June 2013

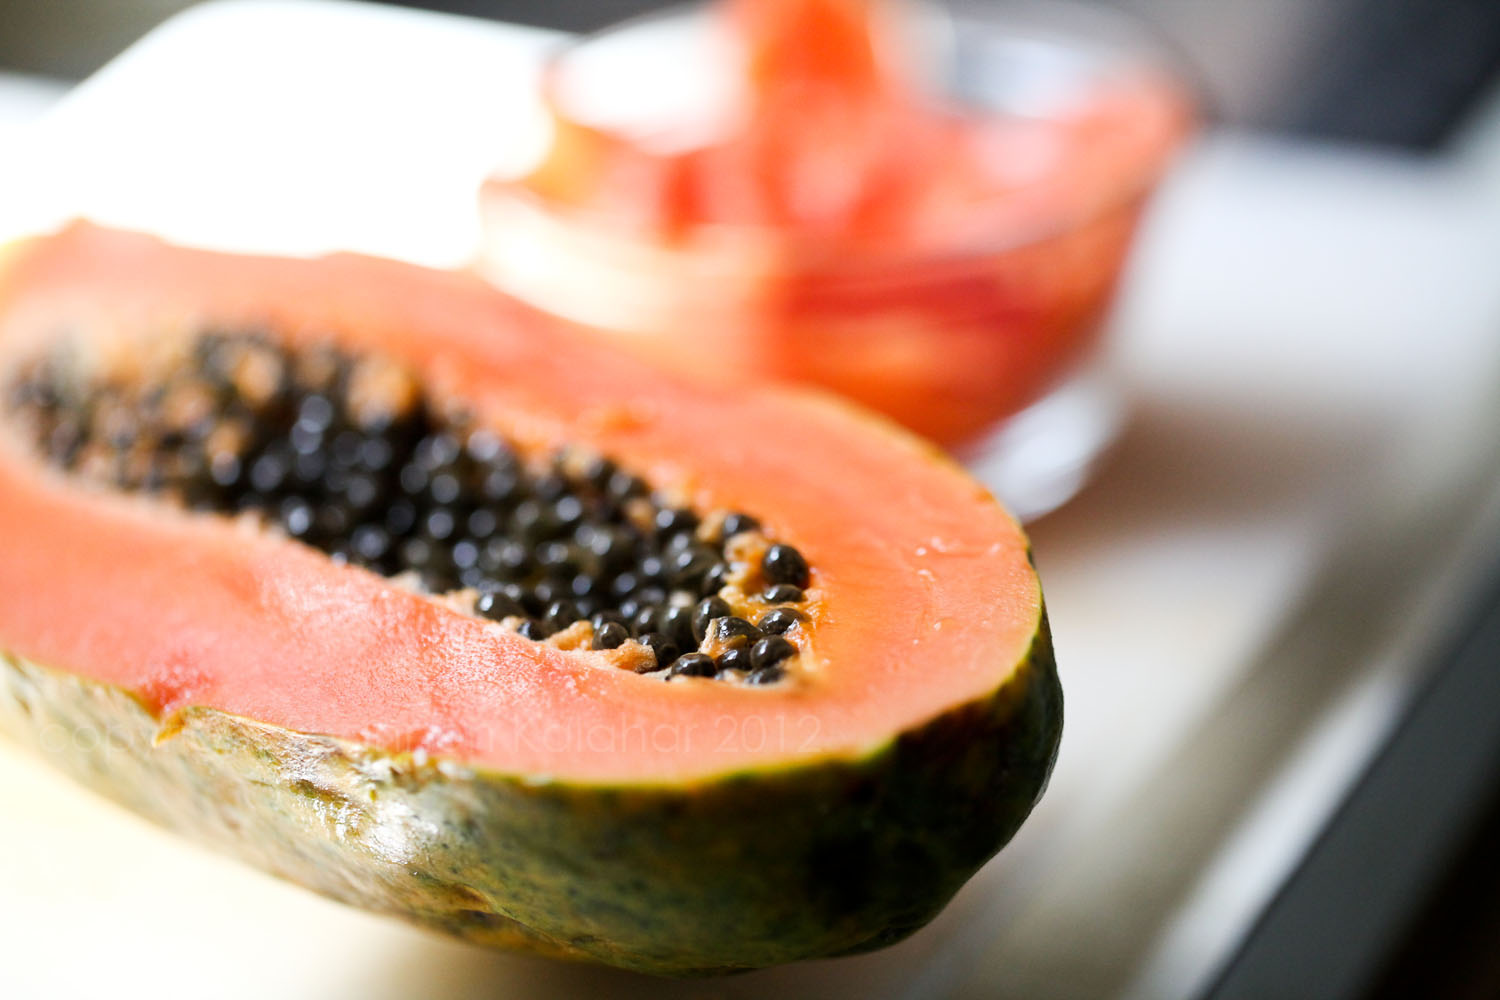
Papaya Pie

This recipe is simply great and a perfect idea to turn your papayas into a delicious and fruity dessert which everyone will surely love and enjoy. This dish is made even faster because this one uses a pre-made graham cracker pie crust rather than making dough for your pie crust. This is rich and delicious because beside papaya, this recipe also combines other healthy ingredients such as cinnamon, nutmeg and ground all spice. Papaya pie is sweet, fruity and delicious dessert which you can easily prepare anytime. What a perfect surprise for your friends who love to surprise you by simply dropping by anytime. Each slice of this delicious dessert makes every meal satisfying and a simple but complete breakfast you can have before going to work. If you have papaya plantation in your backyard, then this is the best thing you have to do with your papayas. Fresh papaya of course is nutritious and real healthy, however, putting papaya in this delicious dessert does not make papaya less nutritious at all. In fact, papaya pie makes you enjoy your favorite fruit more. Other ingredients are also great and nutritious and your papaya becomes even more nutritious if mixed with them. So, get your papaya ready and prepare this exciting dessert immediately. Here are the instructions on how to prepare a delicious papaya pie;

Ingredients

4 large papayas, peeled
¾ cup granulated sugar
1 teaspoon ground nutmeg
1 teaspoon ground cinnamon
2 tablespoons butter, softened
2 tablespoons cornstarch
1 egg
Pie dough for a 2 crust pie
1. Preheat oven to 350 degrees F.

2. In a mixing bowl combine together brown sugar and white sugar. Mix well and then add your papayas. Toss lightly and coat papaya with sugar mixture. Let rest for about 10 minutes.

3. After 10 minutes, transfer papaya and its juice is a saucepan and cook for about 10 minutes. Then add in the nutmeg, allspice, cinnamon and the salt. Cook, stirring occasionally about 10 minutes more or until papayas are tender but not too soft.

4. Remove from heat and let papaya mixture cool. When cooled add beaten egg and mix well, but see to it that fruits don’t fall apart.

5. Pour papaya filling into prepared graham cracker pie crust and bake for 30 to 45 minutes.

6. Remove from heat and let cool

Tuesday, 25 June 2013

Piece of Cake Making Cake

This dump cake recipe is very easy to make. Like the name suggests, you simply dump all the ingredients together in a bowl then you spread them out in a greased baking tray. Bake it in the oven until golden and crusty. Dump cake is rich in fruity flavors with a nice crumb. It is a sure hit to the novice cook as he/she can easily attempt to try. All you need is brown sugar, canned crushed pineapple, box cake mix, grated coconut, chopped pecans, and margarine or butter to make this simple dump cake recipe. Either hot or chilled you can serve this dump cake. Top it with vanilla ice cream and chocolate syrup for an even more indulgent dessert.

Dump cake is designed for the super busy lifestyle. It can be made in a jiffy when you have unexpected guests coming over or if you fancy a baked dessert during the weekdays. The moist and luscious fruits combine perfectly with the cake mix that creates a crunchy layer of crust. Dump cake makes an excellent base for ice creams similar to fruit cobblers. In making this recipe you can also experiment with other types of fruits like peaches, bananas, mangoes, strawberries or raspberries.

There are two ways of making dump cake. Some like to layer the ingredients onto the baking tray. Others like to mix them all together before spreading them out on the tray. In this recipe, before they are baked, the ingredients are all mixed together. This canned crushed pineapple used in this recipe must be drained first before mixing in with the other ingredients. The canned pineapple is a very convenient ingredient that saves you a lot of preparation time. This dump cake is a lovely alternative to more complicated recipes like pineapple upside down cake. This simple recipe can be attempted by cooks who know nothing of baking.

Ingredients

1/2 cup brown sugar
1 can (8 oz) crushed pineapple - crushed, drained
1 box cake mix
1 1/4 cup grated coconut
4/5 cup pecans - chopped
2 tablespoon margarine or butter

1. Mix all the ingredients together in large bowl. Then spread out mixture in a baking tray.

2. In a preheated oven bake for about 30-35 minutes (or until a toothpick inserted in the center comes out clean) at 350 degree F.

3. Allow to cool. Cut into equal pieces.

Heatlhy Cornmeal Rolls

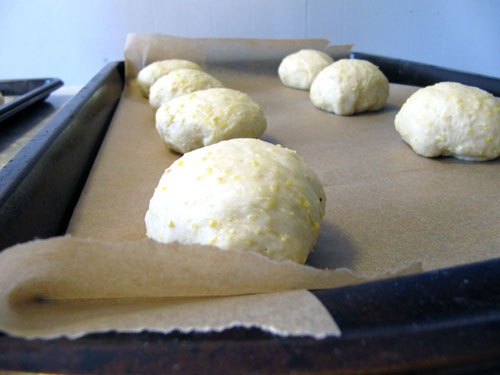
A great meal is never complete without rolls. They make for a great pairing to some of the wonderful soup you have cooked up in your kitchen. They are also wonderful with just about any dish you could think of. People eat roll with salads, roasts, and a whole lot more. You could never go wrong when you have a fresh batch of rolls in your dish. Making these rolls are pretty simple, and even a beginner could make one.

Ingredients

1 ½ cups milk
½ cup shortening
½ cup granulated sugar
2 teaspoons salt
2 tablespoons dry yeast
½ cup warm water
5 to 5 ½ cups all-purpose flour
2 eggs
1 cup corn meal
½ cup melted butter

1. In a saucepan, bring your milk and salt to a simmer on medium heat. Whisk in cornmeal and cook until cornmeal is thick. This would take around 2 minutes and don’t forget to stir constantly.

2. In another bowl, whisk your brown sugar, yeast and water with the use of an electric mixer. Set aside for 10 minutes.

3. With the use of a dough-hook attachment on your electric mixer, mix your cornmeal mixture and 2 eggs on low speed. Add flour slowly until a soft dough is formed and kneed on medium-low speed for 5 minutes.

4. Prepare another bowl by brushing it with olive oil and place dough inside. Cover with plastic wrap and wait for dough to double in size – around 3 hours.

5. In a 13 x 18 inch baking sheet, sprinkle cornmeal and roll out dough in the surface and divide into 3-ounce pieces. Roll the pieces of dough into a ball and place on the baking sheet about 1.5 inches apart. Cover your baking sheets with an oiled plastic wrap and set aside for another 30 minutes until dough has risen again.

6. Place your oven to 375F. Brush your rolls with beaten eggs and make parallel slits on top of your rolls. Bake for 20 minutes or until golden. Transfer on a rack to cool and serve.

Sunday, 23 June 2013

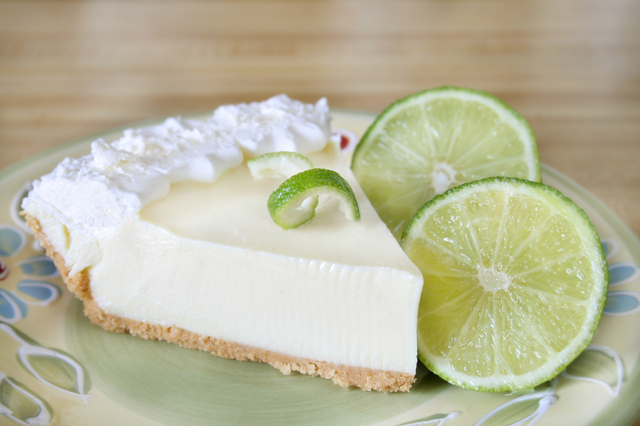
Key Lime Pie

This dessert is super fabulous and great tasting. Perfect creamy and crunchy that will make you forget your diet. Key lime pie is not only an excellent dessert but it is also a complete meal that you can take along with a hot cup of tea or coffee. Kids will love the creaminess and the crunch for their every bite of key lime pie. Super quick and easy to prepare dessert that you can enjoy for as short as 30 minutes. The preparation is easy and quick but definitely exciting. And the ingredients are also great and combining them in one excellent dessert such as the key lime pie is just so perfect. Check out key lime pie video recipes online and get ready with your ingredients because I know you will be rushing home to make your delicious pie. Simply follow the instructions and it will help also if you get to watch preparation and cooking demos of key lime pie. And if you desires, you can make your pie more attractive. Your kids will love and enjoy it even more. To prepare key lime pie, you just simply follow the following instructions;

Ingredients

14 oz. canned sweetened condensed milk
4 eggs, separated
½ cup freshly squeezed juice from Key limes
Pie shell

1. Preheat oven to 325 degrees F.

2. Crushed graham crackers using a blender or a food processor and add melted butter and set aside.

3. In a mixing bowl, combine egg yolks and lime zest and whisk about 2 minutes. Add in milk and then the juice. Beat and set aside until mixture thickens.

4. In another bowl, combine graham crumbs and sugar. Then add the butter and mix well. Transfer mixture in prepared 9-inch pie pan and gently press crumbs at the bottom and sides of the pan.

5. Bake pie crust about 15 minutes or until lightly brown. Remove from heat and let cool at room temperature. When crust cool, pour in the lime filling and bake about 15 minutes or until center sets but not firm. Remove from the oven and let cool.

6. Once cooled, place key lime pie in the refrigerator and let chill at least 3 hours.

7. Slice and serve plain or top with creamy or meringue topping.